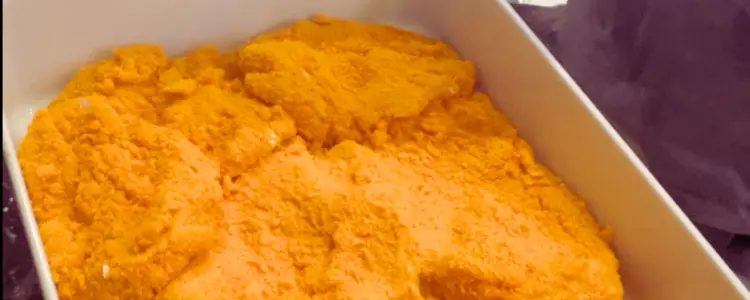
Ingredients:
- 4 boneless, skinless chicken breasts cut and flattened
- 1 cup all-purpose flour
- 2 large eggs
- 1 cup breadcrumbs (plain or seasoned)
- 1/2 cup grated Parmesan cheese
- 1 tsp salt
- 1/2 tsp black pepper
- 2 tbsp fresh chopped garlic
- 1/2 tsp onion powder
- Cooking spray or vegetable oil for greasing
Instructions:
- Preheat your oven to 375°F (190°C) and line a baking sheet with parchment paper or foil. Grease the parchment paper or foil with cooking spray or vegetable oil to prevent sticking.
- Mix the fresh chopped garlic into some olive oil, coat the chicken breasts, and allow them to marinade.
- In a shallow dish, place the flour. In another shallow dish, beat the eggs. In a third shallow dish, combine the breadcrumbs, grated Parmesan cheese, salt, pepper, and onion powder. Stir to combine.
- Coat each chicken breast first in the flour, shaking off any excess. Then dip it into the beaten eggs, allowing any excess to drip off. Finally, coat it in the breadcrumb mixture, pressing lightly to adhere the breadcrumbs to the chicken.
- preheat a baking tray with some oil on it in the oven
- Place the breaded chicken breasts onto the hot baking tray.
- Lightly spray the top of the breaded chicken breasts with cooking spray or drizzle with a little vegetable oil to help them crisp up in the oven.
- Bake the breaded chicken breasts in the preheated oven for 25-30 minutes or until the internal temperature reaches 165°F (74°C) and the breadcrumbs are golden brown and crispy.
- Remove the chicken breasts from the oven and allow them to rest for a few minutes before serving.
- Serve the breaded chicken breasts hot with your favorite sides, such as roasted vegetables, mashed potatoes, or a simple salad and coleslaw. Enjoy the deliciously crispy and flavorful chicken!
Note: Cooking times may vary depending on the thickness of the chicken breasts, so it’s best to use a meat thermometer to ensure they are fully cooked to 165°F (74°C) for safe consumption.
The secret of keeping the chicken moist is not to cut them too thin and make sure to cook them fast in a hot oven.
Some of my articles may contain affiliate links, which means I earn a small commission at no extra cost to you but it does help me with the running costs. As an Amazon Associate, I will earn commissions on purchases but this does not affect my reviews on products or services.
Questions and answers:
Can you use just flour for deep-fried chicken?
Deep-fried chicken is a popular and indulgent dish that is loved for its crispy coating and juicy meat. While many recipes call for a combination of flour and other ingredients to create the perfect fried chicken coating, it is possible to use just flour for deep-fried chicken.
Using just flour for deep-fried chicken can yield a simpler and lighter coating compared to using a more complex breading mixture. To achieve a crispy and flavorful result with just flour, there are a few tips to keep in mind:
- Season the flour: Plain flour can be bland on its own, so be sure to season it generously with salt, pepper, and any other desired spices or herbs. This will help add flavor to the coating and enhance the overall taste of the fried chicken.
- Double-dip or dredge: To create a thicker and crunchier coating with just flour, you can double-dip or dredge the chicken in the seasoned flour. This involves coating the chicken in flour, then dipping it in liquid (such as buttermilk or egg), and then coating it in flour again. This double layer of flour can help create a crispy and substantial coating.
- Heat the oil properly: When deep-frying chicken with just flour, it’s important to heat the oil to the right temperature. The oil should be hot enough (around 350°F to 375°F) to ensure that the chicken cooks quickly and forms a crispy crust without absorbing excess oil.
- Drain excess oil: After frying the chicken, be sure to drain the excess oil on a paper towel-lined plate to remove any excess grease and keep the coating crispy.
Using just flour for deep-fried chicken can be a simple and delicious way to enjoy this classic dish. However, it’s important to note that the result may be different compared to using a more complex breading mixture with additional ingredients like breadcrumbs, cornmeal, or spices. Experiment with different techniques and seasonings to find the perfect flour-based coating that suits your taste preferences.
Do you dip chicken in egg or milk first for breaded chicken?

When it comes to making breaded chicken, there are different methods for achieving a delicious and crispy coating. One common question is whether to dip the chicken in egg or milk first. The answer is, it depends on your preference and the type of coating you want to achieve.
Eggs are a popular choice for dipping chicken in the breading process. Beaten eggs provide a binding agent that helps the breading adhere to the chicken and creates a cohesive coating. To use eggs, simply beat them in a shallow dish and dip the chicken into the beaten eggs before coating it with breadcrumbs or flour.
Milk, on the other hand, is another option for dipping chicken in the breading process. Milk can help create a slightly lighter and less cohesive coating compared to eggs, resulting in a lighter and crispier texture. To use milk, simply pour it into a shallow dish and dip the chicken into the milk before coating it with breadcrumbs or flour.
Both egg and milk can work well in breading chicken, and the choice depends on the desired outcome. Egg tends to create a thicker and more cohesive coating, while milk can result in a lighter and crumbly texture. You can also use a combination of egg and milk for a different texture and flavor.
After dipping the chicken in either egg or milk, be sure to coat it thoroughly with breadcrumbs or flour, pressing lightly to adhere the coating to the chicken. Then proceed with the recommended cooking method, whether it’s frying, baking, or air-frying, to achieve a crispy and flavorful breaded chicken.

Ultimately, whether you choose to dip chicken in egg or milk first for breaded chicken depends on your preference and the texture you want to achieve. Both methods can yield delicious results, so feel free to experiment and find the one that suits your taste preferences best!
Related posts:
- Chichester Wetherspoons: Breakfast or Brunch – A Tough Choice

- Crackling Pork: The Secret to a Delicious British Sunday Roast

- Discover 10 Favorite Ice Cream Flavors in the UK


